Sales Terminal Layout
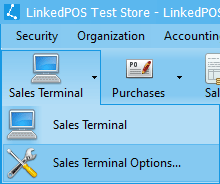
The selling module is designed & developed keeping in mind users of all levels. The Sales Terminal has multiple views allowing the users to choose the one that fits their needs and style. Before starting to create a sales order, it is recommended to visit the Sales Terminal Options... and choose the layout that suits the current needs. Go to main toolbar, click on the Sales Terminal dropdown list and then click on the Sales Terminal Options... menu:-
When the  menu
is clicked ,the sales terminal layout selection screen appears as shown in image below.
This screen allows the user to navigate to different views and finally select the layout that will
appear for the sales terminal. At the bottom of the sales terminal layout selection screen, a toolbar
can be seen. Press the Next button to navigate to next layout and press the Previous button
to navigate to the previous layout. In between the Next and Previous buttons, a couple of more buttons
can be seen that facilitate changing the size of the displayed text and related controls.
menu
is clicked ,the sales terminal layout selection screen appears as shown in image below.
This screen allows the user to navigate to different views and finally select the layout that will
appear for the sales terminal. At the bottom of the sales terminal layout selection screen, a toolbar
can be seen. Press the Next button to navigate to next layout and press the Previous button
to navigate to the previous layout. In between the Next and Previous buttons, a couple of more buttons
can be seen that facilitate changing the size of the displayed text and related controls.
When the layout and display size is finalized, press the
 button and
then press the
button and
then press the  button
to close the Sales Terminal Layout selection screen. Again, go to main toolbar, click on dropdown
list Sales Terminal and then click on the
button
to close the Sales Terminal Layout selection screen. Again, go to main toolbar, click on dropdown
list Sales Terminal and then click on the
 menu.
The Sales Terminal screen with selected layout will open as shown in the image below:-
menu.
The Sales Terminal screen with selected layout will open as shown in the image below:-
Creating Sales Orders (Invoice)
For adding items into Sale Order "(Invoice)", there are multiple ways. Each possible method is described in the subsequent paragaphs:-
Item Search Bar Auto Complete
Click inside the Items search bar to bring the cursor into this bar and start typing. On typing the first character, all items starting with that character will appear in the dropdown list. Highlight the required item using the up & down arrow keys and hit the Enter key for adding that item into the Sales Order.

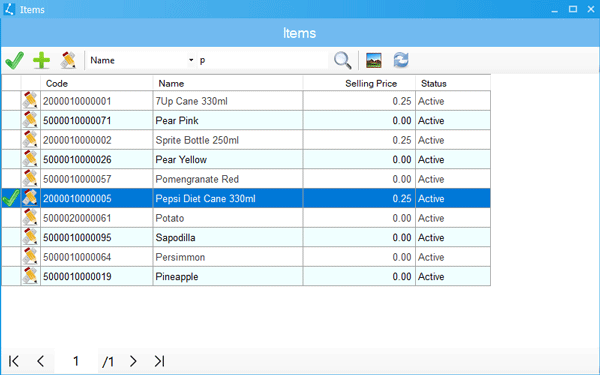
Items List
Press the  button
that can be seen adjacent to the Items Search Bar. A lookup dialog populated with items & products will
pop up as shown in the image below. Select the item and press the
button
that can be seen adjacent to the Items Search Bar. A lookup dialog populated with items & products will
pop up as shown in the image below. Select the item and press the
 button.
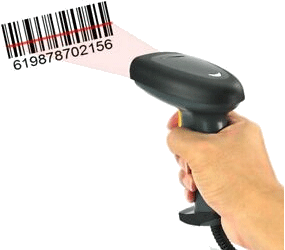
Barcode Scanner
Click on the Items Search Bar to bring the cursor in and then scan the barcode on item using Barcode Scanner. If the Barcode of that item is registered in the system then item will be automatically added into Sales Order.
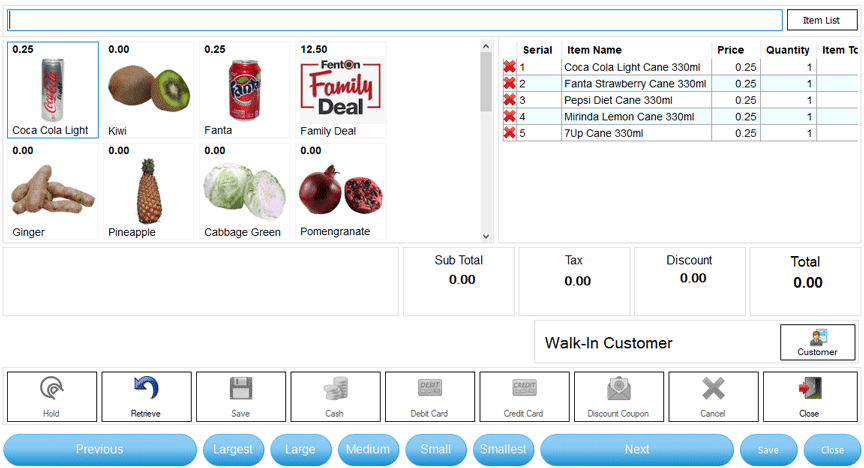
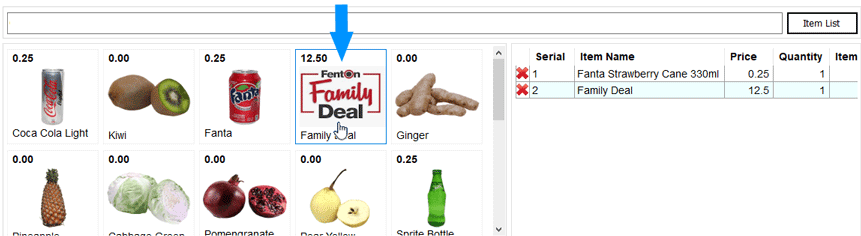
Mouse Click On Item Image
This option is available for layouts of the Sales Terminal where items are displayed in Image Boxes. When the mouse is hovering over the item, the item under mouse gives the feedback by highlighting its border and mouse pointer is changed to a hand. Simply click on the item image and the item will be added into the Sales Order.
Removing An Item From Sales Order
Sometimes removing an item from the Sale Order is required and is very simple to do so. Click on the
 button.
Changing the Price Of An Item
Sometimes, the price of an item is required to be changed temporarily for the current Sales Order only. Simply click in the Price cell of the item and the cell will be changed to Edit mode. Type the new price and hit the Enter key. Sales Order statistics will be updated accordingly.
Changing the Quantity Of An Item
When an item is added into the Sales Order using any method mentioned above, the item is added with a default quantity set in the item profile. Sometimes, the quantity of an item is required to be changed for the current Sales Order only. Simply click on the Quantity cell of the item and the cell will be changed to Edit mode. Type the new quantity and hit Enter key. Sales Order statistics will be updated accordingly.
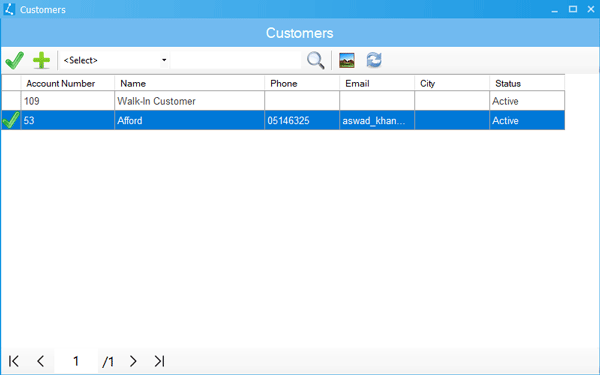
Customer Selection
By default, each Sales Order is created against a Walk-In Customer. But in case of
credit sales or maintaining loyalty programs, it is necessary to create a Sales Order against
specific customer. Press Customer button in customer selection control, then a customer
lookup dialog will appear. Highlight the customer and press the
button.

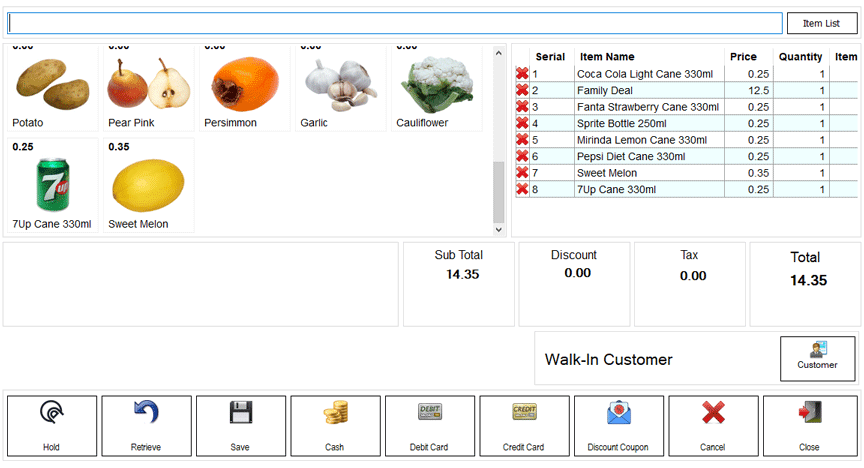
Finalizing Sale Order
The Sales Order can be saved against Cash, Debit Card, Credit Card or Deferred Payment (Credit Sale). Each method is explained below in detail and the image below will be referred to in each method:-

Cash Sale
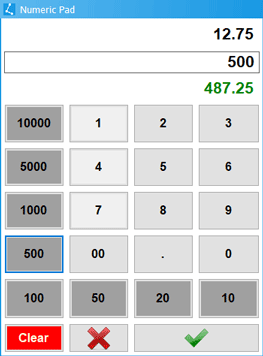
In order to finalize the Sales Order against cash, press the Cash button and that will pop up the dialog below.
Either type the amount from the keyboard or click the numberic figures on the buttons. If the entered amount
is less than Sales Order amount, then the balance amount is displayed negative & RED color i.e.
 .
If the entered amount is more than Sale Order amount then balance amount is displayed in GREEN
color i.e.
.
If the entered amount is more than Sale Order amount then balance amount is displayed in GREEN
color i.e.  .
.
When the appropriate amount is entered, then press the
 button.
The paid amount will be added on screen. Partial payments using different payment methods is also
supported as shown in the image below. Finally, press the Save button and the Sales Order will be saved
in the database as well as printed:-
button.
The paid amount will be added on screen. Partial payments using different payment methods is also
supported as shown in the image below. Finally, press the Save button and the Sales Order will be saved
in the database as well as printed:-

Debit Card Sale
For finalizing the Sales Order against a debit card, press the Debit Card button that will pop up
the dialog below. The amount is pre-populated and can be chagned. Payment Mode is selected as
Debit Card and cannot be changed. Select the card type, enter the card number (optional) and
enter the approval number (optional). Press the
 button and payment
will be added to the Sales Terminal Screen. Finally, press the Save button and the Sales Order will
be saved in the database as well as printed:-
button and payment
will be added to the Sales Terminal Screen. Finally, press the Save button and the Sales Order will
be saved in the database as well as printed:-

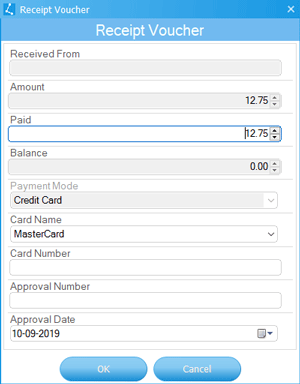
Credit Card Sale
For finalizing the Sales Order against s credit card, press the Credit Card button and that will pop up
the dialog below. The amount is pre-populated and can be chagned. Payment Mode is selected as
Credit Card and cannot be changed. Select the card type, enter the card number (optional) and
enter the approval number (optional). Press the
button and the payment
will be added to the Sales Terminal Screen. Finally, press the Save button and the Sales Order will
be saved in the database as well as printed:-